Difference between revisions of "Battle of Tukayyid Gallery"
Sarna News


m |
m |
||
| (One intermediate revision by one other user not shown) | |||
| Line 7: | Line 7: | ||
Image:Battle of Tukayyid (7).jpg|Illustration by ?? | Image:Battle of Tukayyid (7).jpg|Illustration by ?? | ||
Image:Battle of Tukayyid (9).jpg|Illustration by Earl Geier | Image:Battle of Tukayyid (9).jpg|Illustration by Earl Geier | ||
| − | |||
Image:Battle of Tukayyid (14).jpg|Illustration by Earl Geier | Image:Battle of Tukayyid (14).jpg|Illustration by Earl Geier | ||
Image:Battle of Tukayyid (15).jpg|Illustration by [[Jeff Rebner]] | Image:Battle of Tukayyid (15).jpg|Illustration by [[Jeff Rebner]] | ||
| Line 48: | Line 47: | ||
</gallery> | </gallery> | ||
| − | [[Category: | + | [[Category:Battle of Tukayyid Gallery]] |
Latest revision as of 11:28, 8 March 2021
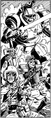
Illustration by Rick Harris '94
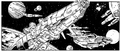
Illustration by ??
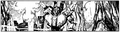
Illustration by ??
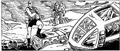
Illustration by ??

Illustration by ??
Illustration by Earl Geier
Illustration by Earl Geier
Illustration by Jeff Rebner
Illustration by ??
Illustration by Jeff Rebner
Illustration by Earl Geier '94
Illustration by Rick Harris '94
Illustration by Rick Harris '94
Illustration by Rick Harris '94
Illustration by Jeff Rebner
Illustration by ??
Illustration by Rick Harris '94

Illustration by Jeff Rebner '94

Illustration by Earl Geier '93
Illustration by Rick Harris '94
Illustration by ??
Illustration by Rick Harris '94
Illustration by Jeff Rebner
Illustration by ??
Illustration by Earl Geier

Illustration by Jeff Rebner '94
Illustration by Rick Harris '94
Illustration by ??
Illustration by ??

Illustration by Jeff Rebner '94
Illustration by Earl Geier
Illustration by ??
Illustration by Earl Geier
Illustration by ??
Illustration by ??

Illustration by ??
Illustration by Rick Harris '94
Illustration by ??
Illustration by ??
Illustration by Earl Geier
Illustration by ??
Illustration by ??
Illustration by ??
Illustration by ??
.jpg)
.jpg)
.jpg)
.jpg)
.jpg)
.jpg)
.jpg)
.jpg)
.jpg)
.jpg)
.jpg)
.jpg)
.jpg)
.jpg)
.jpg)
.jpg)
.jpg)
.jpg)
.jpg)
.jpg)
.jpg)
.jpg)
.jpg)
.jpg)
.jpg)
.jpg)
.jpg)
.jpg)
.jpg)
.jpg)
.jpg)
.jpg)
.jpg)
.jpg)
.jpg)
.jpg)
.jpg)
.jpg)